Showing posts with label cooking. Show all posts

Thursday, 3 September 2015

Recipe - Warm Artichoke Dip

It's been a while since I hosted a 'bring a plate' night at my house. It's a great way to get my busy mum friends together for dinner without anyone having to do all the work. We literally all just bring a plate of something, and we end up having a great selection of dishes and desserts.

The first night I hosted was at my old house, and it was when my good friend Ailsa was still in Glasgow (she emigrated to Australia nearly three years ago... I miss her & her brood so much!). Anyway, I digress. Ailsa made a more-ish artichoke dip that was just delightful. It was so easy to put together and yet tasted/looked like she had made a huge effort.

Well, I was flicking through the Sainsbury's magazine yesterday and stumbled upon a Warm Artichoke Dip recipe that looks pretty much the same as Ailsa's one... so I thought I would share it with you. I think I'll make it this weekend.

Warm Artichoke Dip

Ingredients

1 x 400 g tin artichoke hearts in water, drained
100 g mayonnaise
100 g Parmesan cheese, finely grated

Olive oil and thyme leaves to serve along with a fresh Focaccia bread or similar.


Method

Preheat oven to 200 deg C (fan 180 deg C, gas 6).

Blend the artichokes, mayonnaise and Parmesan cheese in a food processor.

Transfer to an oven proof dish.

Bake for 15 minutes.

Sprinkle with thyme leaves and serve with toasted Focaccia drizzled with olive oil.

Wednesday, 15 July 2015

What's On: Foodies Festival, Edinburgh plus a GIVEAWAY


Next month the Foodies Festival is back at Edinburgh's Inverleith Park on 7th, 8th and 9th August. We had a brilliant time there last year and are super excited to be returning. It was such a fantastic weekend - you can find my previous post here and below is the vlog I created from our weekend antics. This year I'm taking my wee sister Ali & her other half Robin along with us - it's going to be so much fun.


For the 10th Anniversary Celebrations, the event is going to be 50% bigger and there are loads of interesting demos, an extended Producers Market and a huge selection of street food to feast upon...Japanese, Thai, Brazilian, Argentinian, Indian, Mexican, French, African...

There are some hands on masterclasses that sound intriguing... bee keeping, oyster shucking and foraging. There is going to be food and drink pairing masterclasses in the new Wine, Champagne and Craft Beer Theatre; daily cocktail competitions between local bars to find Edinburgh's Best Mixologist and cake modelling and sugar-craft workshops in the Cake & Bake Theatre. It all sounds brilliant!!

For the kids there are Picnic in the Park themed masterclasses in the Children's Cookery Theatre where they can learn to make finger sandwiches, jellies and chocolate bugs (all children under 12 years old go free when accompanied by an adult).

There is also a Chilli Eating Competition that I'm sure Rick will be up for.. can he win the Chilli Eating Crown?

And guess what? I have three pair of tickets up for grabs!! All you need to do is follow the Rafflecopter instructions below.

a Rafflecopter giveaway

If you don't win the tickets, then you can buy yours online at www.foodiesfestival.com or by calling 0844 995 1111.


Competition runs 15th July to 29th July.
There will be three winners; picked at random.
Each prize is one pair of tickets; no cash alternative available.
Thanks to @LanyardMedia for providing this prize

Saturday, 28 February 2015

Recipe - Lamb Stew

When the kids & I were up in Aberdeen for half term, my sisters other half Robin made us a fantastic lamb stew for dinner. The stew was flavoursome but not too spicy so the kids enjoyed it. I'm all for us eating the same meal and so in that respect this recipe is ideal. It's from Two Fat Ladies, Full Throttle and I thought I'd share it with you here with his tips :)

From what I can see on Google, Harrira is a Moroccan soup, but this was definitely more stew consistency than soup as the rice soaked up most of the liquid.

Harrira 

{Ingredients}

115 g chickpeas (from a tin - saves you soaking them overnight!)
350 g lamb in bite-size pieces (Robin recommends you double this lamb quantity to 700 g)
1 large onion, chopped
1 tbsp olive oil
25g butter
1 tsp ground ginger
1 tsp coriander
1 tsp turmeric
1/4 tsp cayenne
1/4 tsp cinnamon
Salt & pepper
900mL - 1.2L chicken stock
400g chopped tomatoes
55g long grain rice
Pinch of saffron
1 red pepper, skinned, de-seeded & cut into strips (another tip - it's better if you don't skin the pepper)
Juice of 1 lemon
1 tbsp chopped parsley

{Method}

Fry the onion in oil & butter until translucent.

Add the lamb and brown evenly.

Add the ginger, coriander, turmeric, cayenne, cinnamon, salt & pepper to taste and fry for a few minutes.

Transfer to a saucepan in which you have the chicken stock, cover & cook gently for an hour.

Add the chickpeas, tomatoes, rice, red pepper and lemon juice and cook for a further 30 minutes.

Sprinkle with chopped parsley before serving.

Robin served the stew with toasted tortilla wraps and it was the perfect accompaniment

It was delicious... thanks guys :-)


Monday, 16 February 2015

Food - Shrove Tuesday

I just logged into Pinterest on my computer to find that I've got over 5K pins... wow!!


Anyway, I thought I'd share with you a few ideas for pancakes seeing as it's Shrove Tuesday tomorrow (Pancake Day).

I'm getting better and better at Scotch Pancakes the more I make them. My son even said that my pancakes were better than TriBeCa...now that's saying something! (For those of you not in Glasgow, TriBeCa is an American diner that serves up amazing pancakes and waffles amongst other things!). When I was growing up, Pancake Day was all about crepes with sugar and lemon, but when I tried making crepes the kids weren't impressed. They prefer the smaller, fatter pancakes.

The recipe I've been using is Nigella's American Breakfast Pancakes and we serve ours warm with butter, jam and sometimes Nutella if I have any.

But do take a look at all these lovely ideas I've pinned...it's making me so hungry!!


Will you be making pancakes tomorrow?

Thursday, 29 January 2015

Review - Donald Russell Ultimate Valentine's Box

When I was asked if I'd like to review the Donald Russell Ultimate Valentine's Box, I jumped at the chance. Yes please!!

For parent's it can be tough to get out for a nice meal, so the thought of being able to prepare a gourmet dinner in the house for Valentine's Day (or any other occasion for that matter!) really appealed to me, as I'm sure it will for many of you.

Donald Russell are Britain's leading mail order meat supplier, and they're based near Aberdeen, my home city. Only the best producers qualify to supply their meat and this was evident in the food that we were sent.

I received a box to my door that contained vacuum packets of fish pie, chateaubriand, potato rosti and chocolate brownies, kept cold with dry ice. I then popped these into the freezer until required. All of the items can be cooked from frozen except the steak. You'll need to remember to defrost this.

There are clear instructions on the website about preparing your dinner, and it really was quite straightforward. 
Starter - Fish Pie


The fish pie was baked for 30 minutes in the oven from frozen and it was presented beautifully in a scallop shell. The portion size for the fish pie was good (it's bigger than it looks!) and we both thoroughly enjoyed it (although Rick didn't eat his prawns - they were passed to me!). The mash was creamy and smooth and the plaice, scallops and prawns in the pie were delicious.

Main - Chateaubriand with Potato Rosti


Most of the time when I've attempted to cook steak at home it's been a bit 'meh'.

This time, I followed the instructions on the Donald Russell website for pan to oven roasting and we both were so impressed with the end result. Rick was a bit unconvinced on the 'resting' but we went with the step-by-step guide and rested the steak whilst we cooked the rosti (cooked from frozen in 15 minutes).

Wow, just wow!

This is without a doubt the best steak I've ever cooked at home. It just goes to show you that it is worth choosing a quality piece of meat. 

The rosti were also lovely and we added some broccoli for a bit of colour.

Dessert - Chocolate Brownie


The dessert was a chocolate brownie, and if I'd thought this through I'd have made sure we had some ice cream for serving, but we didn't so we had ours with custard. Fail on my part - oops! Again, this was cooked from frozen in about 15 minutes and it was seriously so good. Gooey in the middle and crispy on top. The portion size was really generous too.

I'm super impressed with the customer service and quality of food in this gourmet meal in a box. I think it's definitely worth it's price tag (£54.50). You can enjoy an amazing dinner in the comfort of your own home... no babysitters required! Ticks all the boxes for me :-)

We received a complimentary Ultimate Valentine's Box in exchange for this review. All opinions are honest and are my own.

Saturday, 17 January 2015

Review - FoodSaver

My main resolution or goal for 2015 is to get organised. A big part of this for me will be getting back into meal planning, shopping online & batch cooking meals for the freezer. So when I was asked if I wanted to review a FoodSaver I jumped at the chance.

The FoodSaver is a vacuum sealing system that sucks out the air from the bag, sealing in flavour and quality.

The FoodSaver Model: FFS002 has an integrated roll storage and it genuinely is so straightforward to use and easy to clean (the instructions state that it can be used by children aged 8 and over!).

We waste a lot of food and I'm hoping that this gadget will help us keep food longer as it won't perish as fast. I tend to find that food in my freezer gets 'freezer burn' and I can't seem to control the temperature in my fridge very well either, so using the FoodSaver will protect my groceries.

The other added benefit is the reseal function. This means that if I open a big bag of crisps I can reseal the bag before I make my way through the lot so it's great for controlling portion sizes for dieting. 

I thought it would be easier to show you the FoodSaver in use, so here's a little vlog for you. I ended up demonstrating the functionality of the machine by marinading some chicken in a green curry paste. You can marinade in minutes rather than overnight, another huge plus point. As an aside - I do totally realise that you don't need to marinade chicken for a Thai Green Curry but it just happened to be what we were cooking for dinner and it was a good way to show you the FoodSaver in action!


The FoodSaver FFS002 costs £74.99 on Amazon with free delivery, and it comes with 10 bags and a 3m roll plus an accessory hose (for use with FoodSaver canisters). You can then buy replacement rolls, 2 x 5m for £17.80 on Amazon with free delivery. It may not be the cheapest gadget, but I think in the long run it will help me save pounds (& hopefully lose pounds in weight too!).

It's also not the smallest of machines, but it can be stored upright which takes up less space, and it's got a sleek design so it looks good on the counter-top.

I was sent a FoodSaver FFS002 to review. All opinions are honest and are my own.

Saturday, 6 December 2014

Magic Mealtime Moments with Galloway Cheddar

I was sent a lovely hamper from Galloway Cheddar and it included a variety of ingredients for us to create some recipes.

I felt like a contestant in Ready Steady Cook!

Thinking hats on, what would you make with the following?
  • Galloway Cheddar Cheese
  • Haggis
  • Chorizo
  • Tortilla Wraps
  • Peppers
  • Onions
  • Turnip
  • Potatoes
  • Leek
  • Macaroni pasta
  • Oatcakes

With it being near St Andrew's Day, we decided to make something with the haggis and rather than the usual haggis, neeps and tatties, I decided to throw together some Haggis Quesadillas. Super easy to make and they tasted amazing. I cooked the haggis in the microwave, and separately I grated the Galloway cheddar cheese and mixed this with some chopped spring onion. With a frying pan over a medium heat, I added a drizzle of oil before placing in a tortilla wrap. I then sprinkled on the cheese & spring onion mixture and then the haggis before covering with another wrap. I cooked this on both sides until the cheese was all melted. Remove from the pan and cut into wedges. I served this with salad.

The ingredients

Before the top was added!

The final result. Yum!

I also decided to make a macaroni cheese. Seemed obvious given we had the two main ingredients - cheese and macaroni pasta! However I decided to give it a bit of a twist and added sautéed onion, leek and chorizo into the pasta before baking in the oven. 

The ingredients

I cooked some pasta according to the packet instructions, and whilst this was cooking I sautéed some onion, leek and chorizo in a frying pan. After about 5 minutes or when the onions were soft, I took it off the heat whilst I made a cheese sauce. I followed Delia Smith's recipe for an all-in-one white sauce to which I added plenty grated Galloway Cheddar cheese. I then mixed the macaroni, onion, leek, chorizo and cheese sauce all together in a pan before transferring to a dish and sprinkling with even more cheese! Super easy and tasted great.

Chopped onion & keek

Pan fry the chorizo

Add the onion and leeks

Transfer to an oven proof dish

Ta da! Sprinkle with cheese and bake for 20-30 minutes until the cheese has melted.

It was delish!

And then finally, with the remaining ingredients I made a yummy vegetable soup in my slow cooker. Just throw everything in with some stock and cook on slow for a few hours. I then blitzed with my hand blender and served this with oatcakes, and cheese of course!

Galloway Cheddar are giving away £5 cashback towards your next family meal when you buy special promotional packs of their cheddar. Find out more details here. You could also win your own Galloway serving dish by entering a photo of your favourite Family Mealtime Moment


I was sent a hamper of ingredients, a cheese grater and serving dish for the purpose of this post. All opinions are my own and are honest.

Friday, 19 September 2014

{Recipe: Banana & Choc Chip Muffins}

We had friends coming over for a play date the other afternoon and so the littlest & I decided to bake some banana muffins to use up our bananas that had past their best. The recipe we used is based on a Mary Berry one which we found online on the Daily Mail website here.

{Ingredients}

100 g butter at room temperature
2 medium free range eggs
175 g caster sugar
2 medium ripe bananas, peeled
3 tablespoons milk, we used semi-skimmed
225 g self raising flour
1 teaspoon baking powder
50 g milk chocolate chips

{Method}

1. Preheat oven to 170 deg C. My oven is fan assisted.

2. Line a cupcake tin with paper cases. The recipe should make 12.

3. Put all the ingredients except the chocolate chips into a mixer, and mix on low until combined. We used our KitchenAid stand mixer with the flat beater on number 1 for approx 5 minutes & then number 2 for a further 5 minutes or so.

4. Fold in the chocolate chips using a spoon or other kitchen utensil. I think we used a spatula!

5. Spoon the mixture into the cases.

6. Bake for around 25 minutes until the muffins have risen & are golden brown. I turned my oven up to 175 deg C for the last 5 minutes as at 20 minutes they didn't look golden.

7. Stick the kettle on & enjoy a warm muffin with mug of hot tea...perfect!

Ta da!!


They were really good, and our guests loved them too. Thumbs up!!

Another good recipe for bananas is this loaf. Equally yummy!!

Friday, 23 May 2014

{Three Sisters Bake - Courgette & Lime Cake}

I love it when a recipe is easy to follow and when the results actually look the photograph in the recipe book... So I was delighted when my first attempt at the Three Sisters Bake Courgette & Lime Cake turned out like this...


I think the only thing that could have been improved upon was the cream cheese icing... But that's my own fault as I used a 'light' version rather than 'full fat' like the recipe called for. So mine was a bit runnier than I'd have liked. Also not helped by the fact that the littlest was desperate to ice the cake so it was still a little warm when we smothered it with frosting.

The cake itself was lovely & moist (sunflower oil is used in the recipe rather than butter) and surprisingly light & airy. The lime icing worked beautifully with it. It was extremely easy to put together & I personally thought it looked pretty amazing with the courgette ribbons on the top (made with a peeler...no fancy tools necessary). Knowing me, if the cake had staying at the Glasgow Mummy house I'd have demolished the lot (I ate 80% of the Banana Bread we made myself in the space of 12 hours!), so this time we took half of the cake and delivered it to our new neighbours. Hopefully they like it as much as we did - they certainly were impressed with how it looked when we dropped it off!


You'll find the recipe online here, but I'd highly recommend getting your hands on the Three Sisters Bake cookbook. So far we've made the Banana Bread (also fab, see comment above!) and this cake. I'm looking forward to trying out some more of the recipes - they all sound amazing. The photography in the book is beautiful and I find the sisters story inspiring. Hopefully the kids and I will make it out to their cafe at Quarriers Village soon for a visit.


I was sent a complimentary copy of the Three Sisters Bake cookbook, but as always opinions are my own and are completely honest.


Thursday, 13 March 2014

{Simple Smoothies}

Laura, Life as An Hourglass, gave me the great tip that I should freeze any bananas that are starting to go off and then use them in a smoothie! I hadn't even considered that freezing a banana would be possible. What a great idea!

My eldest loves to make smoothies, and I have a Magimix processer which is perfect for the job!

We normally make strawberry and banana smoothies with fresh ingredients, but this time I had frozen banana and blueberries to use, as per Laura's suggestion above. We threw the fruit into the Magimix along with some natural yoghurt and some honey. It was delightful... tasted like an ice cream milkshake without having to use ice cream! (Frozen yoghurt is delicious btw... have you been to Cheer Me Up yet?).

Getting everything organised and ready to go!

I love my grey striped straws!

Laura has loads of great recipes on her blog and think she has some more juicing recipes coming soon. Next on my list is her carrot cake. Mmmmmm!!! 

WebRep
currentVote
noRating
noWeight

Thursday, 19 December 2013

{#ShareAdvent - Favourite Family Recipe}

I made a big pot of Chilli Con Carne when I had guests over for my Social and Cocktail party last month.

Chilli has always been a firm family favourite, and it's ideal for entertaining at this time of the year. Even my little ones enjoy a mild chilli with rice and flour wraps.

I made a batch of chilli, stuck it in the slow cooker on 'warm' as we demolished the cocktails, and then served it with plenty sour cream, guacamole, nachos and salsa. Easy.


Here's the recipe from the BBC GoodFood website, that both Ali (my sister) and I have used at recent parties we've thrown. I'm sharing this for today's #ShareAdvent prompt, favourite family recipe.

{Ingredients}

1 tbsp oil
1 large onion, chopped
1 red pepper, chopped
2 garlic cloves, finely chopped (I use ready garlic in a tube)
1 tsp hot chilli powder
1 tsp paprika
1 tsp ground cumin
500 g lean minced beef
1 beef stock cube
400 g can chopped tomatoes
1/2 tsp dried majoram
1 tsp sugar (I added two squares of dark chocolate instead when I added the beans)
2 tbsp tomato puree
410 g red kidney beans

{Method}

Put your pan over a medium heat. Add the oil and leave for a minute until hot.

Add the onions, and cook until soft (about 5 min).

Add the garlic, red pepper, chilli powder, paprika and ground cumin. Stir and leave to cook for 5 minutes.

Add the meat and break it up with a spoon or spatula. Keep stirring until the mince is in uniform sized lumps and there are no more pink bits.

Make up the beef stock cube in hot water. Pour this into the mince mixture.

Add the tomatoes, marjoram, sugar, salt, pepper and tomato puree.

Bring the whole thing to the boil, then turn the heat down and leave it for 20 minutes gently bubbling.

Add the kidney beans (& chocolate) and leave to cook for another 10 minutes. Taste the chilli, and season as necessary.

Replace the lid and take it off the heat. Leave to stand for 10 minutes prior to serving.

Wednesday, 4 December 2013

{#ShareAdvent - Wreath Wednesday}

For today's #ShareAdvent prompt, Wreath Wednesday, I thought I'd share with you this fabulous idea that I came across on Pinterest (shock!).


Isn't this a lovely idea for presenting some nibbles at a Christmas drinks party... pick a suitable plate, create a wreath of rosemary and then place some olives, mini gherkins, mozzarella and the like on top. Easy, but looks great.

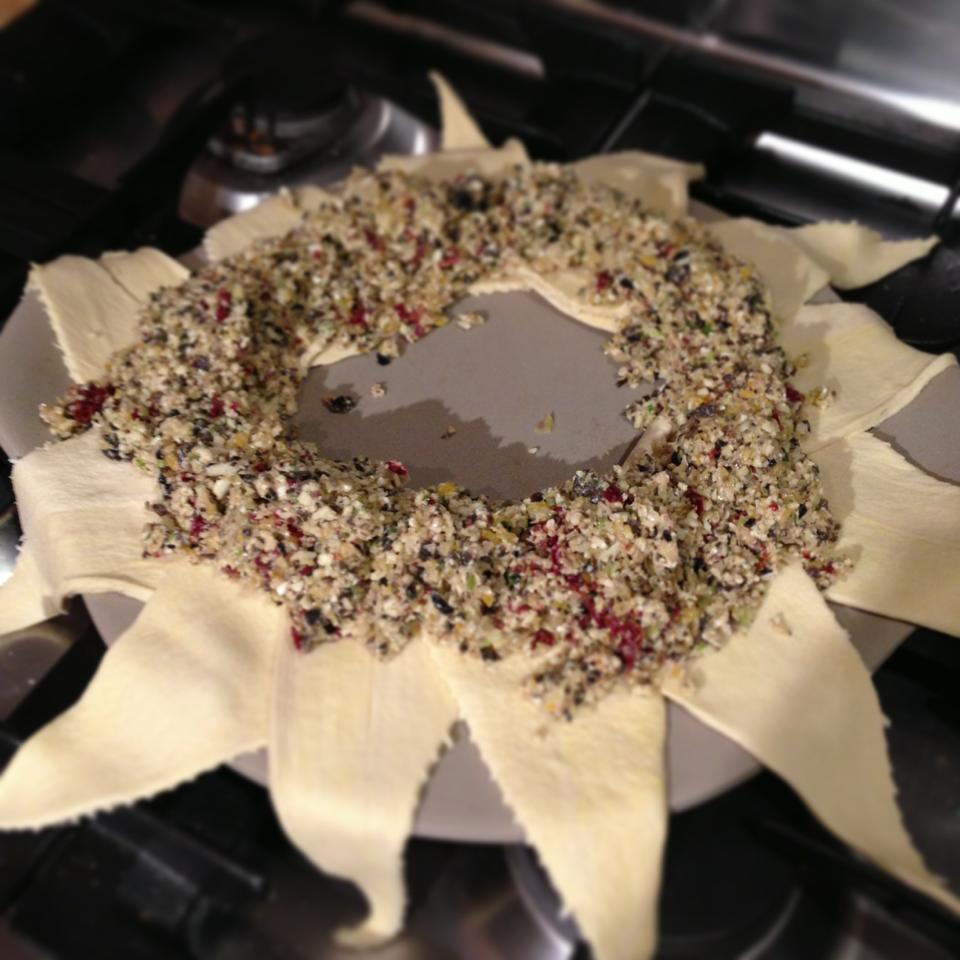
Another easy dish to put together is the Mediterranean Vegetable Pastry Ring... find the recipe in an earlier post of mine here. Sort of looks like a wreath?


One final idea for this prompt is wreath cookies... these look really impressive but I think they'd be fairly straightforward to put together if you've got the right cookie cutters:

Lemon, Pistachio and Cranberry Wreath Cookies {image source}


Wednesday, 6 February 2013

{Recipe: Blueberry Cheesecake}

Last night I had five of my mum friends round for a 'bring a plate' night. I made a Mediterranean Vegetable Pastry Ring (recipe here) whilst the others brought chilli nachos, roasted vegetable pasta, a selection of cured meats, cheese, homemade chocolate truffles and chocolate pots and the most amazing blueberry cheesecake.

During preparation!

The finished article!

The spread... yum!!

And again!

The star of the show... the cheesecake with blueberry sauce!

My small* portion

I've asked Heather to share her recipe with me, so here it is - thanks Heather...

Blueberry Cheesecake

{Ingredients}

450g blueberries
200g caster sugar
200mL water
1tbsp cornflour

For the base:
250g digestive biscuits
85g  butter, melted

For the filling:
300mL double cream
100g caster sugar
500g cream cheese
zest of 1 lemon
1tsp vanilla extract


{Method}

Put 200g of the (softer) blueberries into a pan with 200g sugar and 175mL water.

Heat slowly to dissolve the sugar, then simmer for 7-8 minutes.

Mix the cornflour with the remaining 25mL water and stir into the mixture. Simmer, stirring for 2-3 minutes.

Strain through a fine sieve into a bowl, pressing the berries into the sieve to extract as much juice as possible. Leave to cool.

Line a 20cm springform cake tin with greaseproof paper. Crush the biscuits in a food processor to coarse crumbs.

Mix with the melted butter, then pack into the cake tin to make the base, pressing it down with the back of a spoon.

Whip the cream and 100g caster sugar until stiff.

In another bowl, beat the cream cheese to soften, then fold in the cream along with the lemon zest and vanilla extract.

Lightly fold through half of the blueberry syrup to create a rippled effect.

Spoon this filling onto the base, then place in the fridge for 2-3 hours until firm.

Mix the rest of the fruit with the remaining syrup.

To unmould the cheesecake, run a hot knife around the edge and then release the side of the tin and slide the cheesecake onto a board.

Cut into slices and serve each one topped with a generous spoonful of blueberry sauce.

*I keep telling myself that it goes towards my five a day, and the portion I had last night (along with the leftovers today!) doesn't count!! ;-)


Beauty with a Conscious

I volunteer most weeks with the Prince and Princess of Wales hospice, located in Bellahouston Park, Glasgow, where I deliver a mindfulness m...